 Sewing Machine Needlecase
By Andrea Goddard, Quiltique
Materials:
Two fat quarters
1/4 yd Pellon Fusible Fleece
1/4 yd Quilter's Vinyl
Coordinating thread
Tailor's chalk
Clover Wonder Clips
Optional: Clover Bias Tape Maker 1" or BERNINA Binding Attachment size 26-30mm, Teflon Foot
Cutting Directions:
From Main Fabric and Lining Fabric, cut on 6" x 13-1/2"
From Fusible Fleece, cut one 5" x 12-1/2"
Quilter's Vinyl, cut two 2-1/2" x 13-1/2"
For Binding, cut two 1" x 15"
For Bias Binding Ties, cut two 1" x 11"
Instructions: 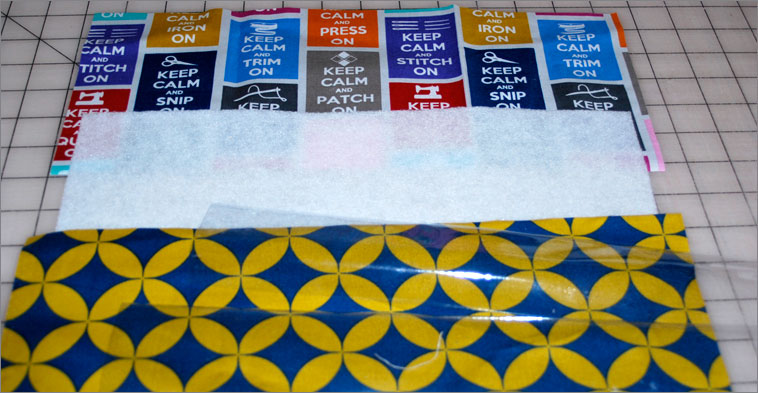 Cut out fabric as indicated above.
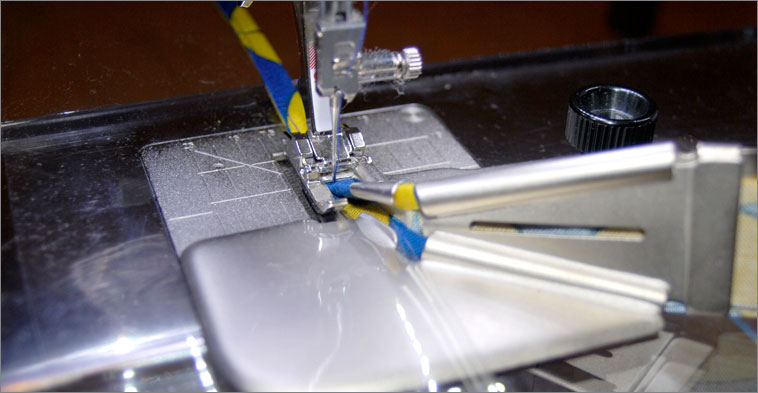 Bind the long edge of each piece of Quilter's Vinyl. I used the BERNINA binding attachment to sew my ties and attach the binding all in one swoop. If you do not have this, you can use the Clover 1" bias tape maker to press your bindings.
For the ties, you want to make two pieces that are 11" long. Sew the ties along one long edge, catching both sides and leaving the short edges unfinished. Then tie a knot at one end of each tie. The opposite edge will be caught in the seam.
Bind the two pieces of vinyl along one long edge. Leave the short edges unfinished as these will again be caught in the seam. Set these pieces aside for later.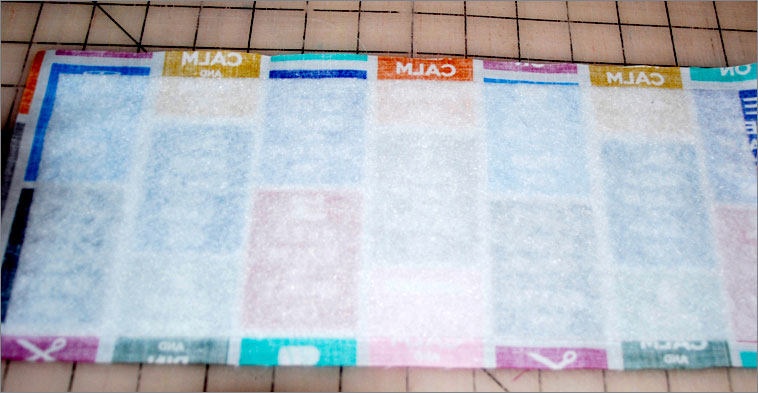 Center and fuse the piece of Fusible Fleece onto the wrong side of the outside piece of fabric. This piece is cut smaller to prevent the seam allowance from being too bulky.
 Line up the long edge of the bound vinyl strip to the right side of the long edge of lining fabric. Pin in place using the Wonder Clips. (Note: Straight pins will pierce the vinyl, so always use Wonder Clips when using vinyl or laminated fabrics.) Using a teflon foot, sew together with 1/4" seam allowance. Repeat for other side.
Now it is time to mark the pockets for the needle packs. If you use a lot of a specific package, measure and make sure they'll fit. I found that most standard packages fit in a 2" to 2-1/4" pocket.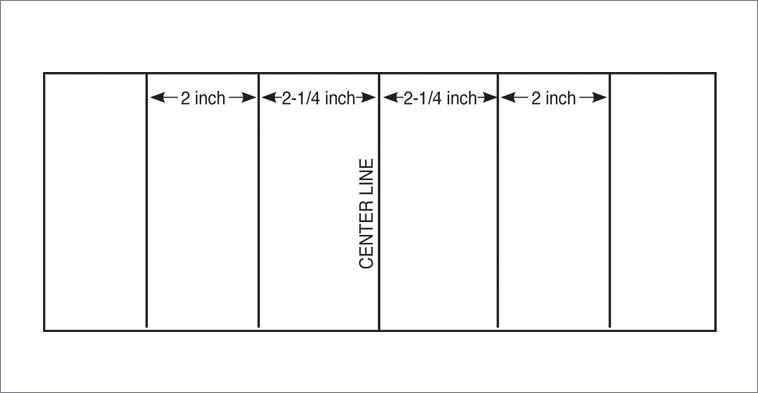 Measure and mark with chalk, 6-3/4" from the left short edge. This should be the exact center of the piece. Mark over 2-1/4" from center line and then 2" from that line.
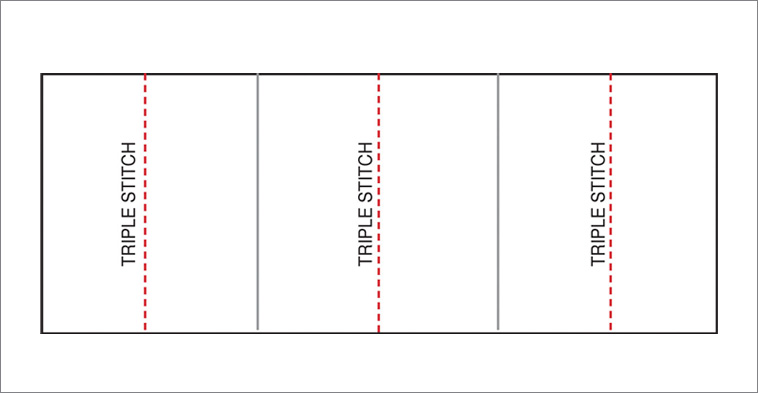 Sew with a Triple Stitch down the center line. Then sew the two outer lines. Do not sew the remaining two lines. These will be sewn later.
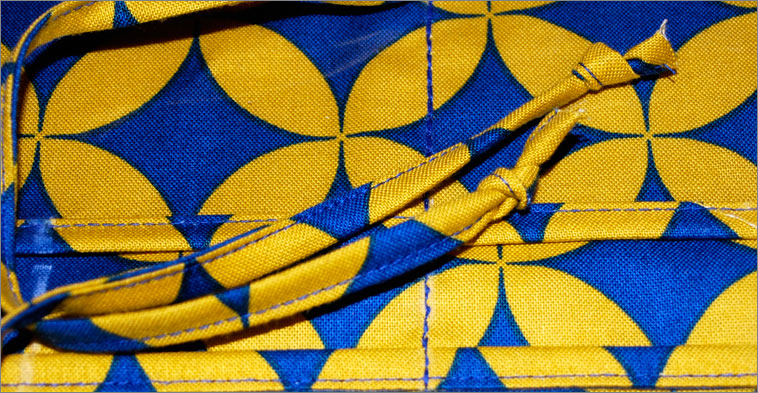 Attach the ties by basting in place with 1/4" seam in the center of the lining panel.
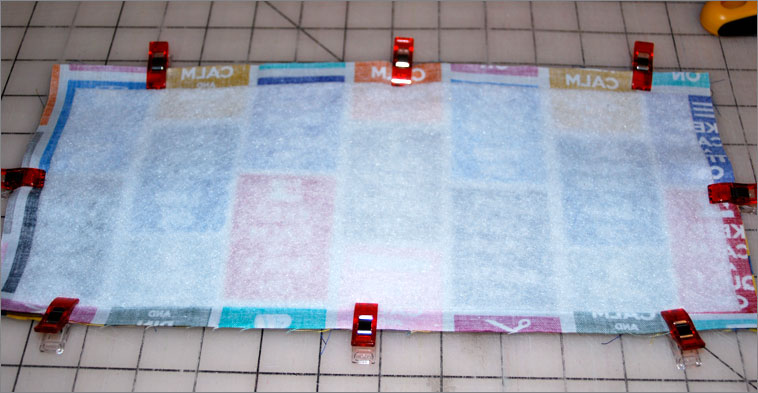 Pin the lining panel and the main panel right sides together using the Wonder Clips. Sew around with 1/2" seam allowance, leaving a 5" opening for turning on a long edge. Trim the corners without clipping into the seam and then turn right side out. Flatten edges using a pressing tool. Do not iron the vinyl!
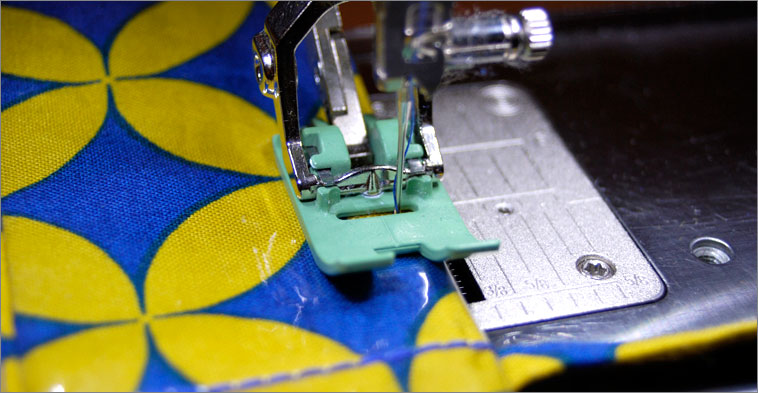 Topstitch around all four sides, catching the opening in the seam. Using the teflon foot will help to feed the fabric through. I move the needle position over to make a nice 1/8" topstitched seam.
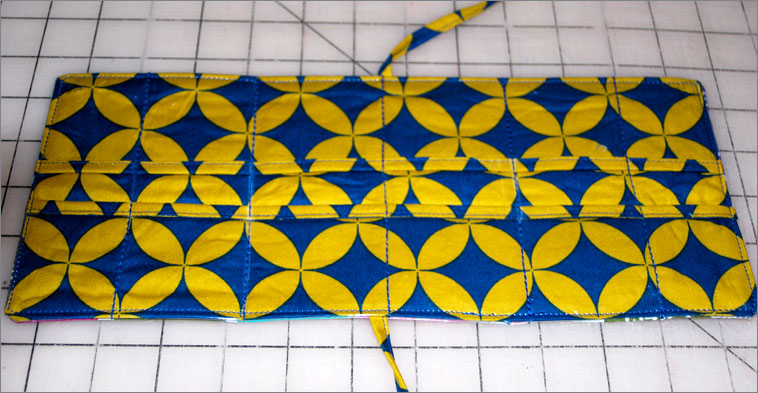 Triple stitch the last two pocket seams at this time, going through all layers. These lines will make the fold lines to hold the needle case together.
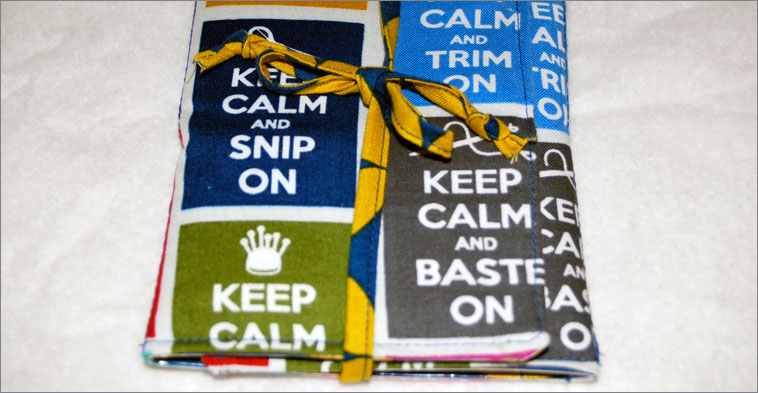
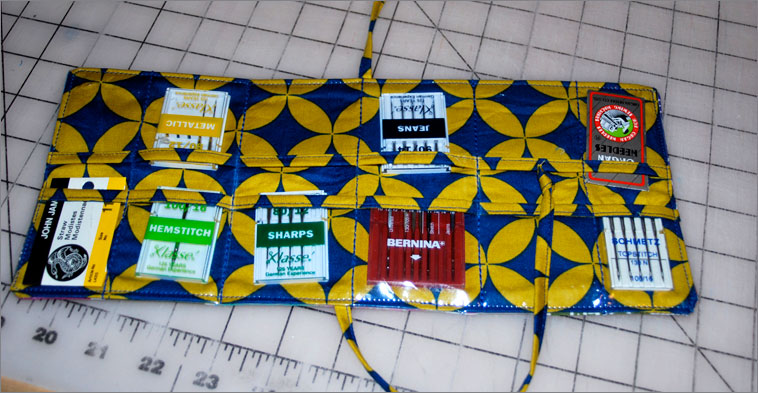 Place your needles inside and enjoy!
Andrea Goddard is a young sewer/crafter who loves to create a wide variety of projects. She both works and teaches at Quiltique in Henderson, Nevada. Watch for more creative, quick and fun projects from Andrea on BREWERInspires.com.